The most exquisite luxury vinyl is merely a thin veil, destined to betray every secret hidden by the ground beneath it. While you may be captivated by the rich honey tones or the intricate grain of a new collection, the true longevity of your investment rests upon a foundation that remains unseen. Learning how to prepare a subfloor for vinyl installation is not a mere chore of construction, but rather the meticulous curation of an invisible canvas. It's the silent guardian that ensures your chosen masterpiece resists the unsightly telegraphing of imperfections or the distressing buckle of moisture. You likely feel the weight of this responsibility, understanding that a single overlooked tile or a slight deviation in levelness could compromise the elegance of your sanctuary.
This guide offers the clarity and confidence required to transform a raw surface into a site of enduring excellence. You'll discover the precise art of moisture management and the rigorous standards of floor flatness, ensuring every plank rests in silent, permanent harmony. We'll explore the necessity of removing old materials and the specific measurements that protect your vision. This is your path toward a floor that is as durable as it is beautiful.
Key Takeaways
- Understand how a meticulous subfloor acts as the silent soul of your home, preventing the unsightly "telegraphing" of imperfections that can mar the surface of your vinyl.
- Master the curator's assessment by applying the 3-meter rule to verify absolute flatness, ensuring your floor remains a perfectly level and silent stage for your daily life.
- Discover exactly how to prepare a subfloor for vinyl installation through a cleansing ritual that removes old residues and restores a pH-neutral surface for flawless bonding.
- Navigate the nuanced requirements of different structural bases, from the porous nature of concrete screeds to the unique challenges posed by existing ceramic tiles.
- Learn the essential ritual of material acclimation, a final step that harmonizes your flooring with its new environment to prevent future instability or movement.
Table of Contents
The Silent Foundation: Why Subfloor Preparation is Essential for Vinyl Longevity
The subfloor represents the foundational narrative of your interior, acting as the structural soul upon which every other element is composed. While the vinyl itself captures the eye with its curated textures and deep, resonant colors, the subfloor determines how those materials will behave over decades of use. If the ground is compromised, the material above will eventually mirror those flaws. This phenomenon, known in the architectural world as "telegraphing," occurs when the subtle undulations, grit, or cracks in the base are physically projected through the resilient vinyl layer. By mastering how to prepare a subfloor for vinyl installation, you ensure that these invisible imperfections do not become visible tragedies that disrupt the visual flow of your space.
For those selecting the high-end vinyl flooring Dubai designers often favor for its blend of performance and beauty, a stable foundation is paramount. It protects the delicate click-lock joints from excessive vertical movement, which is the primary cause of premature separation and wear. Approaching this process with the patience of a restorer transforms the installation from a simple renovation into a commitment to heritage. You aren't just laying a floor; you're anchoring a room's history on a base of enduring excellence.
The Aesthetic Impact of a Flawless Base
A perfectly level surface is essential for the way light interacts with your home. In a room bathed in natural light, even a minor deviation can cast a soft shadow, breaking the illusion of a continuous, seamless expanse. Beyond the visual, the subfloor defines the auditory character of the room. A meticulously prepared base eliminates the hollow echoes and rhythmic clicks that occur when planks bridge over low spots, replacing them with a solid, resonant-free walking experience that feels substantial and permanent. It prevents the aesthetic tragedy of gaps and buckling that can occur in luxury spaces when the ground fails to support the artistry above.
Protecting Your Artisanal Investment
Treating the subfloor with reverence is a matter of practical wisdom as much as aesthetic pride. Most premium manufacturers require strict adherence to industry standards, such as the ASTM F710 protocol, to maintain warranty compliance. Meticulous preparation offers a significant return on investment by extending the life of the material significantly. It transforms the floor from a temporary surface into a cultural artifact of your home, ensuring that the tactile feel underfoot remains consistent, firm, and luxuriously supportive for generations. Investing time in how to prepare a subfloor for vinyl installation today protects the beauty of your sanctuary tomorrow.
The Curator’s Assessment: Evaluating the Integrity of Your Existing Floor
The curator’s eye sees beyond the dust; it seeks the fundamental truth of the foundation through three distinct lenses: cleanliness, dryness, and levelness. Understanding how to prepare a subfloor for vinyl installation begins with this rigorous diagnosis, as even the most opulent planks cannot mask a failing structural base. Before the first gesture of installation occurs, the surface must be stripped of its history, leaving a pure, neutral stage that is free of old adhesives, oils, or loose debris. This initial cleansing is not merely about hygiene but about ensuring a chemical and physical bond that will endure for generations.
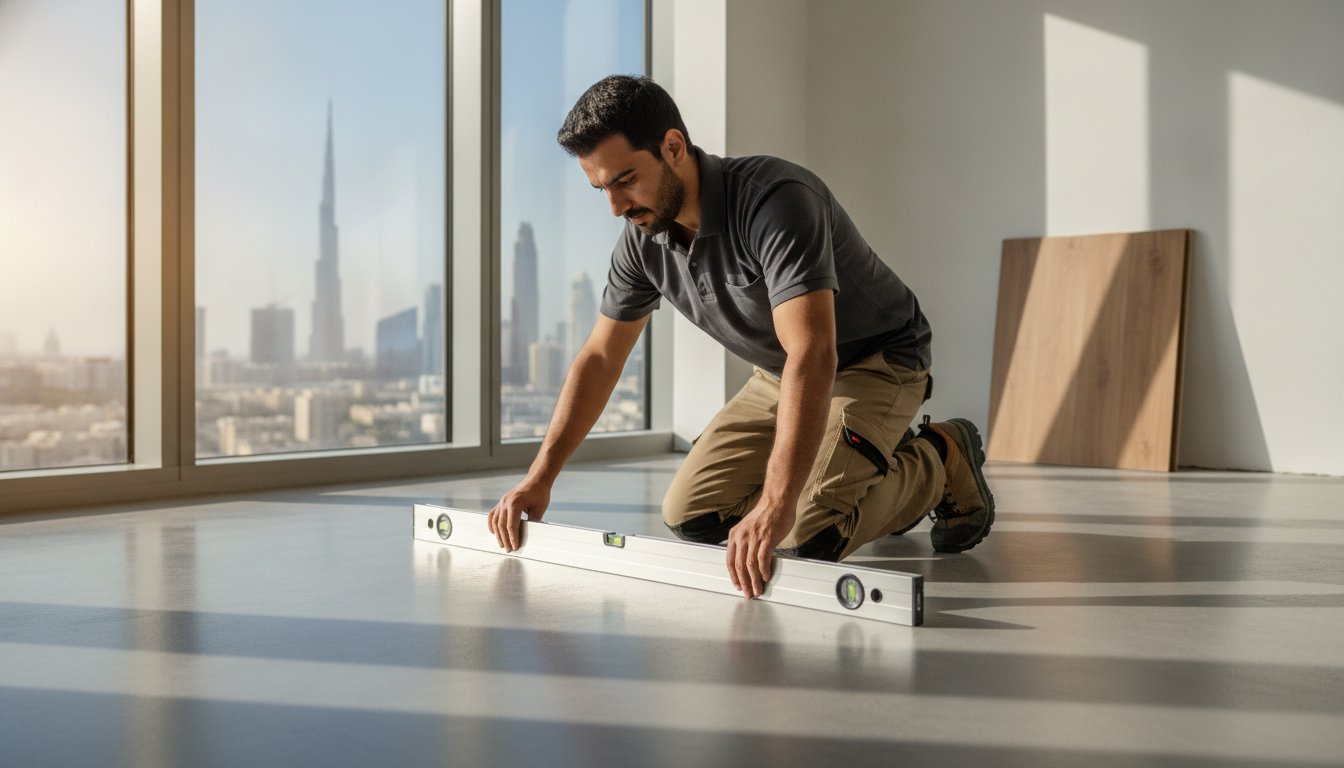
Geometry is the next pillar of this assessment, specifically the adherence to the 3-meter rule. Using a precise straightedge, one must verify that the subfloor is flat to within 3/16th of an inch over a 10-foot radius, a standard echoed by the ASTM F710 practice. Any deviation beyond this threshold creates a void where the vinyl may flex, leading to the eventual fatigue of the locking mechanisms. By identifying these high and low points early, you can plan for the delicate application of leveling compounds or the careful sanding of peaks, ensuring the floor remains a silent, stable expanse. When selecting premium vinyl options, this assessment becomes the bridge between a vision and its lasting reality.
Measuring Moisture and Thermal Stability
In the unique climate of the Middle East, moisture is a subtle but persistent adversary. For concrete screeds, a professional hygrometer test is essential to ensure the Relative Humidity (RH) remains at 75% or less, while calcium chloride tests should yield results of 3 pounds or less per 1,000 square feet. These metrics are particularly critical for SPC flooring Dubai installations, where the rigid core demands a dry environment to prevent the buildup of hydrostatic pressure. A robust moisture barrier acts as a vital safeguard, protecting the integrity of the floor against the region's characteristic humidity and temperature fluctuations.
Identifying Unsuitable Subfloor Conditions
A seasoned connoisseur looks for the quiet warnings of structural distress before proceeding. White, powdery efflorescence on concrete suggests rising damp, while older timber foundations must be inspected for the soft, fibrous textures of rot or the telltale signs of insect intervention. It's also a fundamental rule that any existing "floating" floors, such as old laminate or loose-laid vinyl, must be entirely removed. These layers lack the necessary permanence to serve as a base, and laying new material over them invites instability and movement that compromises the artisanal finish of the final installation. If the alkalinity of your concrete exceeds a pH of 9, professional remediation is required to ensure the long-term success of your investment.
The Cleansing Ritual: Removing Debris and Addressing Imperfections
Restoring a subfloor to its primordial purity is a task that demands the patience of a conservator. Before the new material can be introduced, one must exorcise the vestiges of the past, including old adhesives, stubborn paint splatters, and layers of ancient wax that have accumulated over decades. These remnants are not merely unsightly; they are chemical ghosts that can interfere with the bond of modern adhesives or create microscopic ridges that ruin the final finish. Mastering the physical labor of how to prepare a subfloor for vinyl installation requires a commitment to the restorative arts, ensuring that every square inch of the base is as clean as a fresh canvas in a private gallery.
A critical, yet often overlooked, component of this ritual is the maintenance of a pH-neutral environment. Modern luxury vinyl relies on a stable chemical relationship with the ground, and residues from acidic or highly alkaline cleaners can compromise this delicate marriage. Following the removal of debris, the surface should be treated with neutral solutions to ensure the alkalinity remains at a pH of 9 or lower. For concrete surfaces, any high spots or ridges must be carefully sanded down, a process that requires a gentle hand to avoid compromising the structural integrity of the slab. Conversely, deep voids and structural cracks should be filled with high-quality, polymer-modified patching compounds, which provide a smooth, resilient surface that mirrors the excellence of the flooring it will soon support.
The Precision of Levelling Compounds
When faced with expansive areas that deviate from the required flatness, the application of a self-levelling underlayment becomes an essential act of architectural refinement. These specialized liquids flow with a grace that gravity dictates, seeking out low points to create a surface that is perfectly horizontal and tension-free. For more subtle transitions or minor imperfections, the artisanal application of a feather-finish compound allows for a seamless blend between different subfloor heights. This meticulous layering ensures a smooth, non-porous surface, which is the ideal state for achieving optimal adhesive contact and a truly silent floor.
Eliminating Contaminants and Residues
The presence of old carpet glue or chemical residues poses a significant risk to the longevity of your investment. These substances must be entirely removed through mechanical means, such as scraping or grinding, rather than through the use of harsh chemical strippers. Chemical solvents often leave behind an oily film that can react unpredictably with the backings of new vinyl planks, leading to discolouration or bonding failure. As a final, essential step in how to prepare a subfloor for vinyl installation, a high-efficiency vacuuming ritual must be performed. This ensures that even the most microscopic dust particles are removed, leaving behind a pristine, dust-free canvas ready for the first plank.
Tailoring the Approach: Preparing Specific Subfloor Materials for Vinyl
Every structural base possesses its own unique character, demanding a bespoke philosophy of care that respects its inherent properties. The mineral foundation of a concrete slab requires a different devotion than the organic resonance of timber, and failing to acknowledge these differences can lead to a disharmonious final result. When considering how to prepare a subfloor for vinyl installation, one must treat the existing material as the first chapter of a new story, ensuring that its history does not conflict with the future you are building. Whether you are working with the cool permanence of stone or the flexible warmth of wood, the goal remains a surface of absolute integrity and silence.
Beyond the structural base, the choice of underlayment acts as the final, acoustic cushion that elevates the experience of your home. This layer is not merely a barrier but a sophisticated element that enhances the tactile softness underfoot and provides a silent, resonant-free environment. It serves as the final bridge between the raw subfloor and the refined beauty of your chosen planks. If you are ready to begin your journey with materials of unparalleled quality, explore our curated selection of vinyl flooring to find the perfect anchor for your space.
Concrete and Cementitious Screeds
A concrete slab, while seemingly immovable, is a dynamic entity that requires a significant period of "curing" before it can be deemed a suitable host. For new foundations, a minimum of 28 days is typically required to allow the internal moisture to stabilize, a process that cannot be rushed without risking the integrity of the adhesive bond. In the porous landscape of concrete, sealing the surface is often a necessary act of architectural refinement, preventing the slab from absorbing excessive amounts of adhesive and ensuring a consistent, firm attachment. Additionally, expansion joints within the subfloor architecture must be respected and addressed with appropriate fillers to prevent them from telegraphing through the vinyl over time.
Wooden Subfloors and Plywood Underlayment
Timber foundations bring a natural rhythm to a home, but they also require a meticulous eye for detail to eliminate the indignity of floor squeaks. Every loose board must be secured to the joists, and all fasteners must be carefully countersunk and filled to create a seamless, uninterrupted plane. When installing a plywood underlayment, selecting the correct grade is paramount, ensure you use a material specifically rated for underlayment that is free of internal voids. Joints should be staggered to provide maximum structural stability, with proper gapping left at the edges to allow for the natural expansion and contraction of the wood as the seasons change.
Existing Ceramic or Stone Tiles
The challenge of laying vinyl over existing ceramic or stone tiles is one of texture and permanence. One must first verify that every tile is firmly bonded to the structural slab, as any loose or hollow-sounding piece will eventually compromise the new floor. Deep grout lines, the signature of traditional tiling, must be filled with specialized embossing levellers to prevent them from appearing as ghostly impressions on the surface of your vinyl. In some instances, particularly where the stone is uneven or heavily textured, the virtuous path is the total removal of the old floor to reveal the raw slab beneath, ensuring the most stable foundation possible for your new investment.
The Final Inspection: Transitioning from Preparation to Artisanal Installation
The final inspection is a quiet ritual of verification, a moment where the rigorous science of subfloor preparation meets the anticipatory art of the first plank. Having mastered the complexities of how to prepare a subfloor for vinyl installation, from the mechanical removal of old residues to the precise application of levelling compounds, you now stand at the threshold of transformation. This stage is less about labor and more about environmental harmony. A final, contemplative walkthrough ensures that no microscopic dust has settled on your pristine canvas, preserving the integrity of the bond you've worked so diligently to secure. It's the bridge between the structural and the aesthetic, where the invisible foundation finally becomes a stage for beauty.
This transition marks the shift from the heavy work of restoration to the delicate act of creation. Every measurement taken and every imperfection smoothed now serves a higher purpose, allowing the vinyl to rest with a level of permanence that only meticulous care can provide. As you prepare to lay the first piece, the silence of the room should mirror the stability of the ground, creating a sense of timelessness that will define the space for decades to come.
Acclimatisation and Environmental Control
Vinyl requires a dedicated period of 48 hours to harmonise with the specific climate of its new surroundings. This window of time allows the material to reach thermal equilibrium, preventing the indignity of post-installation expansion or contraction that can occur in fluctuating environments. It's essential to maintain a consistent ambient temperature during this process, ensuring the room remains stable. For those integrating radiant heat, the surface temperature of the subfloor must be carefully monitored to ensure it never exceeds 85°F (29°C), a standard that protects the artisanal integrity of the floor from the stresses of extreme heat.
The Virtue of Professional Expertise
While understanding how to prepare a subfloor for vinyl installation empowers the discerning homeowner, certain architectural canvases require the seasoned hand of a master installer. A professional site assessment offers the ultimate peace of mind, providing a level of scrutiny that identifies subtle risks before they manifest as visible flaws. This expert touch ensures that your investment is protected by generations of specialized knowledge and a commitment to quality that transcends fleeting trends. We invite you to consult with the connoisseurs at Zia and Sagor Carpets Trading LLC to discover curated solutions that transform your vision into a foundation of enduring excellence.
Anchoring Your Vision in Enduring Excellence
The journey from a raw, storied slab to a refined, modern surface is a testament to the patience of the connoisseur who understands that true beauty is never skin deep. By mastering the meticulous steps of how to prepare a subfloor for vinyl installation, you've ensured that your chosen material rests upon a foundation of absolute silence and structural integrity. You've transitioned from the rigorous science of moisture testing to the delicate art of material acclimation, creating a canvas that's worthy of the finest artisanal finishes. This dedication to the unseen ensures that your home remains a sanctuary of aesthetic excellence for decades.
With over 15 years of GCC flooring expertise, we understand the unique environmental demands of the region and the necessity of specialized creation. Our master craftsmen are dedicated to the slow, precise nature of high-end installation, ensuring that every plank reflects our commitment to quality. We invite you to explore our curated collection of Vinyl and SPC flooring solutions, featuring premium, fire-rated, and hygienic selections designed for the most discerning spaces. Your path toward a home filled with meaning and unparalleled beauty begins with a foundation that's as enduring as it is exquisite.
Frequently Asked Questions
Can I install vinyl flooring directly over an existing concrete floor?
You can certainly install vinyl directly over concrete, but only if the slab has been meticulously assessed for moisture and flatness. The concrete must be entirely free of dust, oils, and old sealers to ensure the adhesive or the underlayment can perform as intended. It's the purity of this mineral base that allows the vinyl to lay flat and silent, acting as a permanent anchor for the room's aesthetic narrative.
How level does my subfloor actually need to be for luxury vinyl?
When considering how to prepare a subfloor for vinyl installation, the standard of flatness is absolute. Your surface must be level to within 3/16th of an inch over a 10-foot radius, a measurement that ensures the delicate locking mechanisms of your planks aren't subjected to undue stress. This precision prevents the subtle flexing that can lead to audible clicks or eventual structural fatigue that mars a premium finish.
Is it necessary to use an underlayment if my subfloor is already smooth?
Even if the subfloor feels smooth to the touch, an underlayment is often essential for its acoustic and thermal properties. It serves as a sophisticated cushion that absorbs sound and provides a gentle, resonant-free walking experience that feels substantial. For certain rigid core products, an integrated backing might be present, yet a separate moisture barrier may still be required to protect the integrity of the material from the ground's natural dampness.
How do I test the moisture level of my concrete subfloor at home?
The most reliable method involves using an RH probe or a calcium chloride moisture test to ensure the environment is suitable for installation. For concrete, the Relative Humidity should ideally be 75% or less to prevent the buildup of moisture that can damage the floor's core. While some attempt a simple plastic sheet test, professional testing kits provide the concrete data required to protect a luxury investment with absolute certainty.
Can I lay new vinyl over my old ceramic tiles without removing them?
You can indeed install new material over existing tiles, provided the original stone is firmly anchored to the structural slab. It's vital to fill deep grout lines with a high-quality embossing leveller to create a seamless plane. This step is a critical part of how to prepare a subfloor for vinyl installation, as it prevents the grid of the tiles from appearing as a ghostly impression on your finished floor over time.
What happens if I don’t remove old adhesive from the subfloor?
Failing to remove old adhesive is a compromise that can lead to a physical and chemical failure of your new installation. Old residues can react unpredictably with new backings, causing permanent discolouration or preventing the fresh adhesive from achieving a secure bond. Additionally, any remaining ridges will eventually telegraph through the vinyl, marring the visual purity of your space with unsightly bumps and lines that disrupt the flow of light.
How long should I wait for a new concrete screed to dry before installation?
A new concrete screed requires a minimum of 28 days to cure before it's ready to receive a resilient floor. This period allows the internal moisture to reach a stable state, ensuring that hydrostatic pressure doesn't compromise the adhesive bond. Rushing this process is a risk to the heritage of your home, as trapped moisture can lead to unsightly buckling or the growth of mould beneath the surface of your planks.
Do I need to acclimate vinyl planks if the subfloor is already prepared?
Acclimatisation remains a non-negotiable ritual that must occur within the room where the flooring will be laid. Allowing the planks to rest for at least 48 hours ensures they harmonise with the local temperature and humidity, preventing the material from shifting after it's been installed. This stage is about the material's internal stability, whereas subfloor preparation is about the ground's external readiness; both are required for a masterpiece that endures for generations.